What are easy ways to retrofit an existing home to include green features?
Owning a 1920’s Craftsman Four Square, my energy bills had been taking me to the bank. Literally. The insulation was sloppily installed – and I take full credit for that – since I did it myself when I first bought the home over 20 years ago. I also installed the ductwork back then, with – egads – lots of duct tape. And you could actually feel the breeze sitting next to one of my single pane windows.
There are a multitude of simple tasks a homeowner can do to make their home more energy efficient. I’m systematically going through my home, correcting my mistakes of years ago, and already seeing huge gains.
Insulation
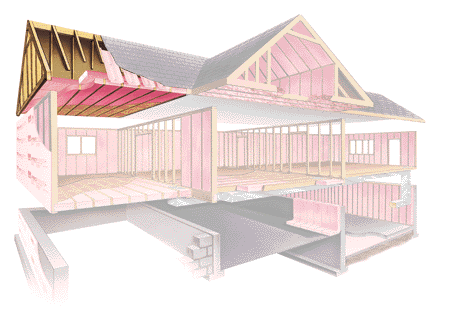
First, I did a close examination of all my insulation. When I bought the house, there was batt insulation of maybe a maximum R-13 value laid between the ceiling joists in my attic. I had bought rolls of R-19 batt and rolled them perpendicular to the joists, but honestly was not that careful about it, leaving plenty of gaps. So now, I’ve gone in the attic and rearranged the existing insulation to a tighter pattern, making sure that all edges were snug to the adjacent batt. After that, I purchased additional rolls of R-19 batt and then again laid these perpendicular to the existing upper layer. Now I’ve got a total of an R-51 in my attic. Easy to do, just make sure you wear gloves, long sleeves and pants, eye protection, and a breathing mask. Oh, and try not to do it in the middle of summer…
Speaking of the attic, one of the best things I did was to create an insulated box cover for my pull down stair. This opening just happened to be right next to my thermostat, so in the summer the heat would just billow down from the attic, causing cooling system to run non-stop. Think about it – I had all this insulation everywhere else but had this huge uninsulated hole where conditioned air could escape and the heat of the attic can penetrate down into the living space. To remedy this problem, I purchased some rigid insulation and built a light-weight box to fit over the stair when it’s closed. Constructed of two layers of the rigid insulation on the top and the sides and taped together with foil tape, it’s light enough to easily lift off the opening when I need to access the attic. I also installed weather stripping on the bottom edges of the sides, so it seals tightly all around the opening when properly positioned. I’ve been really amazed at the dramatic difference in the conditioning of my upstairs.
As for the basement, the insulation situation was even worse. (While I’m a huge fan of sealed crawspaces, my basement is really just an oversized crawlspace, 5’ to 7’ high, and too large to consider sealing it.) With all the renovation that’s occurred during my ownership, the insulation had been pulled away in spots for plumbing and wiring, and in some places had just fallen down. Wearing again the same protection, I’ve reinstalled the fallen insulation and installed new where there was none. I’ve also installed new wire supports making sure to adequately support the insulation without compressing the insulation too much (compressing reduces the insulation value of insulation.)
My exterior walls do not have any insulation at all. While there are ways to cut holes in the walls and blow in insulation to the cavity, it’s very expensive and, in the region I live, middle of North Carolina, the savings in energy would take a very long time to justify the cost. I did, however, caulk along all the floors at the exterior wall baseboards with clear caulk (my shoe molding and floors are wood) and installed weather-strip gaskets in all the electrical outlets on the exterior walls. These gaskets are cheap and easy to install – simply take off the outlet plate and the gasket fits snuggly around the outlet, and then reinstall the cover plate. This simple task really helps stop any unwanted and unconditioned air from entering through these openings, especially if there’s no insulation in the walls.
Read more in our next blog…

